
Self-Sufficiency Garden to pantry
Make Your Own Preserves
Make a plan for your harvest, choose the right preservation method, and build a supply of food you will actually use.
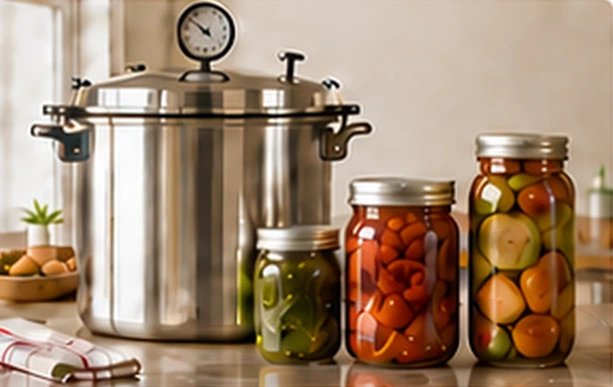
- Start with
- One crop, one tested method
- First project
- A small batch of freezer beans
- Storage
- Freezer, fridge or pantry—as directed
A generous harvest can arrive faster than a household can eat it. Preserving gives those tomatoes, beans and berries a place in future meals—and gives you a reason to plan beyond the next picking.
Here, “preserves” includes frozen produce, fruit spreads and properly canned vegetables. The flexible part is choosing a method that suits your crop and your household. The canning process itself needs a tested recipe. There is no single brine, cooking time or jar-filling method that safely covers every garden harvest. [1]
01 / Decide where it will live
Choose the method before you fill a jar
Begin with one question: will the finished food stay frozen, stay refrigerated, or sit unopened on a pantry shelf? Those are different preservation jobs.
A sealed lid does not prove food is safe
A vacuum seal cannot make up for incorrect ingredients or processing. Botulism toxin may be present without changing a food’s smell, taste or colour. Never taste a suspect jar to check it. [1]
Refrigerator pickles and freezer jam belong in the storage conditions their recipes specify. They do not become pantry preserves simply because you put them in canning jars.
02 / Work with what you grow
Match your harvest to a useful preserve
These familiar garden crops offer a starting point. Follow the linked crop instructions or a complete tested recipe before you begin; the table is a planning guide, not a processing schedule.
| Your harvest | A practical starting point | What matters |
|---|---|---|
| Tomatoes | Freeze prepared tomatoes for cooking, or use a tested crushed-tomato recipe. | Thawed tomatoes soften. Canned tomatoes need the specified added acid; the linked recipe requires it even for its pressure-canning options. [7][11] |
| Cucumbers | Choose a tested vinegar-pickle recipe, such as fresh-pack dill pickles. | That recipe uses pickling cucumbers and 5% vinegar. Keep its vinegar, water and produce proportions; do not substitute other vegetables. [10] |
| Beans, peas, carrots & beets | Use the crop-specific freezing directions. Green beans are the worked example below. | Preparation is not identical: beans, peas and carrots have different blanching times; beets are cooked before freezing. Plain canned versions require pressure canning. [4][2] |
| Peppers & zucchini | Follow the separate guides for sweet peppers and summer squash. | Use the preparation for the form you want to freeze. A pepper preparation is not a general instruction for zucchini, and neither should be added to a plain tomato canning recipe. |
| Strawberries, raspberries & blueberries | Freeze using the individual fruit guides, or choose a tested jam recipe for that fruit. | Use the recipe’s fruit, sugar and pectin amounts. For less sugar, choose a recipe designed for that purpose. Do not rewrite a conventional jam formula. [9] |
| Apples, pears & plums | Consider a tested applesauce recipe, or the appropriate fruit-freezing guide. | Follow the exact fruit, preparation and packing instructions. A recipe for one fruit is not permission to substitute another. |
The National Center for Home Food Preservation at the University of Georgia supplies the crop guides and tested recipes linked above. Use the source’s stated measurements and jar sizes; do not assume that “pint”, “quart” or “cup” has the same meaning in every country.
03 / Set up for a small success
Get ready before harvest day
Choose a batch you can finish with the time, equipment and storage you have. Start with produce in good condition, rather than treating preservation as a way to rescue spoiled food.
- For any method: clean hands, a clean work area, drinkable running water, measuring tools, a timer, labels and the complete instructions beside you.
- For freezing: freezer-rated containers or bags, a freezer thermometer, and any pot, basket and cooling-water setup the crop requires.
- For canning: the specified canner and rack, proper canning jars of the required size, new self-sealing lids, sound bands, a jar lifter, funnel and headspace measure.
Wash produce under cool running water. Check the recipe’s ingredients and quantities before cutting or heating. Follow the lid manufacturer’s preparation instructions. [1][12]
04 / A hands-on first project
Freeze a small batch of green beans
This method is for green, snap or wax bean pods. It makes food for the freezer, not shelf-stable jars. Have freezer containers or bags, a large covered pot with a blanching basket, cold water and ice ready.
Choose and prepare the beans
Use young, tender pods. Rinse, remove the ends and cut into pieces about 5–10 cm long. Work in small batches. [5]
Bring plenty of water to a vigorous boil
Allow about 4 L of water for 450 g of prepared beans. Lower the basket into the water and cover. The water should return to a boil within one minute; if it does not, use less produce in the next batch. [4]
Start the timer when boiling resumes
Water-blanch the beans for 3 minutes, maintaining the boil. This time applies to these bean pods; do not use it as a blanket rule for all vegetables. [5]
Cool immediately, then drain
Move the beans straight into plenty of ice-cold water. Cool for about as long as the blanching time, until thoroughly cold. Drain well so excess water does not reduce frozen quality. [4]
Adapted in original wording from University of Georgia/NCHFP guidance. The water quantity and bean lengths are approximate metric equivalents. Blanching controls quality-changing enzymes; it does not turn vegetables into a ready-to-eat, shelf-stable product.
Have fruit instead?
Follow the fruit’s own preparation directions. The strawberry guide, for example, explains berry preparation and links to unsweetened packing methods. Use their instructions for packing, headspace and freezing, and choose portions that suit your later meals. [8]
05 / When you want pantry jars
Choose a tested recipe, then follow it through
For shelf-stable preserves, use a complete current recipe from a reliable preservation authority. Read its equipment guidance and altitude table as well as the ingredient list. These three projects illustrate different uses for a harvest:
Strawberry jam
A tested pectin jam for a berry harvest. Use its exact fruit, sugar and pectin amounts.
Read the complete NCHFP recipe Vinegar pickleFresh-pack dill pickles
A cucumber recipe with a separate soaking step and a specified pickling solution.
Read the complete NCHFP recipe Tomato stapleCrushed tomatoes
A plain tomato preparation with required acidification and processing tables.
Read the complete NCHFP recipeThe links above contain the full recipes. The overview below does not replace their ingredient quantities, preparation, jar sizes, headspace or processing schedules. [9][10][11]
Prepare the canner, jars and food
Follow the source’s jar-heating or sterilisation instructions and its order of preparation. A cold jar, hot jar, raw pack and hot pack are not interchangeable choices. Measure the specified headspace—the gap between the food and the lid. [12]
Complete the required heat process
Use the exact method and altitude-adjusted schedule. For boiling-water processing, keep jars covered by the required depth of water and begin timing when the full boil returns. If boiling stops, bring it back and restart the entire processing time. Follow the source’s waiting period before lifting jars out. [12]
Cool undisturbed, then check seals
Keep jars upright on a protected surface and cool for 12–24 hours. Do not retighten bands while hot. After cooling, remove bands and test the lids: a centre that springs back when pressed is unsealed. [13]
Plain vegetables require a different pressure-canning procedure. Consult NCHFP’s canner guidance before starting; a small pressure saucepan is not a substitute for a proper pressure canner. [12]
06 / Turn batches into meals
Store, label and rotate
Label each batch with the food, date, recipe source and required storage. Add it to a simple inventory, and plan to use older batches first.
- Properly canned, sealed jars: clean and dry them, store without the screw bands, and choose a cool, dark, dry location. Plan to use them within one year for best quality, unless the recipe gives other advice. [14]
- Frozen fruits and vegetables: maintain −18°C or colder. NCHFP gives a general quality window of 8–12 months for properly prepared and packaged produce; this is not permission to keep food that has been mishandled or thawed unsafely. [6]
- Refrigerator preserves and opened jars: keep at 4°C or colder and follow the recipe’s refrigerated use-by advice. Do not apply the unopened jar’s storage life after opening. [15]
If a jar fails to seal
If a correct tested process was followed and you discover the failure within 24 hours, refrigerate promptly and follow the source’s short-term use guidance, or freeze in suitable packaging. Do not leave it in the pantry. [14]
If the recipe or processing was incorrect, a seal does not rescue the batch. Do not taste it or rely on refrigeration after the fact; follow authoritative disposal guidance. Discard suspect jars with leaking, bulging or other spoilage signs without tasting. [1][14]
Green beans · water-blanched 3 min
Packed 18 October 2026 · Keep frozen at −18°C or colder
Method: NCHFP green/snap/wax beans
07 / Prepare for real life
Build a useful reserve, not just a full shelf
Choose foods your household already cooks. A sensible first plan might be a few freezer portions of beans, a tested batch of tomato preserves and a small jam batch. Record how quickly each gets used before expanding next season.
Freezing is convenient, but its dependence on electricity matters during a power outage. Keep freezer doors closed, use a thermometer and follow official food-safety advice before keeping or refreezing food. Do not judge safety by tasting. Canada’s power-outage guidance includes a food-safety link and preparation checklist. [16]
For preparedness, keep some ready-to-eat, shelf-stable food and drinking water as well. Preserving garden vegetables is a useful household skill, but it is one part of an emergency plan. [16]
08 / Common questions
Before you make the next batch
Can I use one pickling liquid for any vegetable?
No. A tested pickle recipe accounts for its ingredients, preparation and processing. Use a recipe for the vegetable you have, keeping the specified vinegar strength and proportions. A cucumber recipe is not a general formula for carrots, beans or mixed vegetables. [1][10]
Can I use less sugar in jam?
Choose a tested reduced-sugar or no-added-sugar recipe and the pectin it specifies. Reducing sugar in a conventional jam can change the gel and preservation conditions. Follow the finished product’s storage instructions, including refrigeration or freezing when required. [9]
Can I invent a salsa for pantry storage?
Use a tested salsa recipe for canning. Adding onions, peppers or other low-acid ingredients changes the mixture; the instructions for plain tomatoes no longer apply. Add your preferred extra ingredients after opening a safely canned product instead. [2][11]
Start with a harvest you know and a method you can follow. A modest supply of well-labelled food, used regularly and replenished thoughtfully, is a practical way to make your garden part of everyday resilience.
Read the guidance
Sources & further reading
Original PUREARTH writing based on Canadian public-health guidance and University of Georgia/NCHFP preservation resources. Sources checked October 18, 2026. Full recipes and their altitude tables remain essential; this article does not establish a new canning process. Additional crop-specific guides are linked in the harvest table.
- Health Canada — Home canning safetyCanadian guidance on botulism, hygiene, tested recipes, jars, lids and storage.
- NCHFP — Ensuring Safe Canned FoodsAcidity, low-acid foods, heat processing and elevation adjustments; based on USDA home-canning guidance.
- NCHFP — Freezing: crop-by-crop guidesIndividual fruit and vegetable preparations; use the page for your exact crop and desired form.
- NCHFP — Blanching VegetablesWater volume, timing from the return to a boil, rapid cooling and crop-specific blanching times.
- NCHFP — Freezing Beans: Green, Snap, or WaxSource for the worked example: preparation, three-minute water blanch and half-inch headspace.
- NCHFP — How Long Can I Store Frozen FoodsPackaging, storage at 0°F (approximately −18°C), quality windows and stock rotation.
- NCHFP — Freezing TomatoesSeparate preparations for raw tomatoes, juice and stewed tomatoes; thawed texture and intended uses.
- NCHFP — Freezing StrawberriesFruit preparation and a link to dry or tray packing for unsweetened fruit.
- NCHFP — Strawberry Jam Pectin and sweetener guidanceComplete tested jam recipe; the page’s general guidance explains why regular and reduced-sugar preparations are different.
- NCHFP — Quick Fresh-Pack Dill PicklesPickling cucumbers, specified 5% vinegar, preparation stages and altitude-dependent processing.
- NCHFP — Crushed Tomatoes (with no added liquid)Required acidification, hot preparation and full canning schedules.
- NCHFP — Using Boiling Water CannersEquipment setup, water coverage, process timing and removal. See also recommended canners for pressure-canning equipment.
- NCHFP — Cooling Jars and Testing Jar SealsThe 12–24-hour cooling period and methods of checking cooled lids.
- NCHFP — Storing Home Canned FoodsUnsealed jars, properly processed batches, storage conditions, quality and suspect food.
- Health Canada — Safe food storageCanadian refrigerator and freezer temperatures, storage and safe handling.
- Government of Canada — Power outages: How to prepareFood and water planning, keeping cold appliances closed, and Health Canada’s emergency food and water guidance.